The Configure Tool dialog allows you to add/remove plugin packages or individual Plugins from a tool. To
display the Configure Tool dialog, select File ![]() Configure.This dialog is also displayed when you create a new
tool.
Configure.This dialog is also displayed when you create a new
tool.
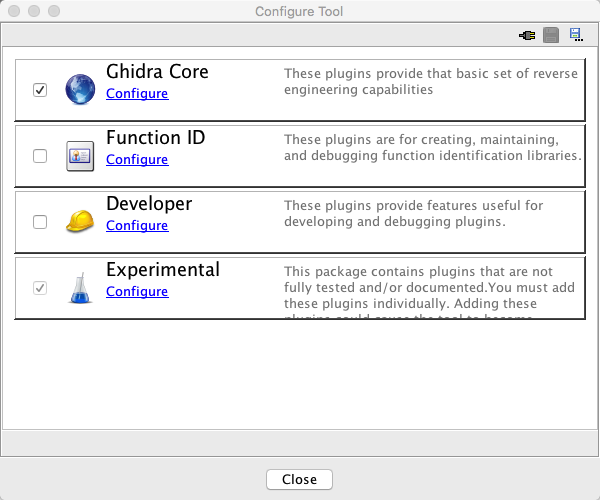
The Configure Tool dialog shows a list of plugin packages that can be added to the tool. Clicking the unchecked checkbox will add all the plugins in the package that are at the supported level (typically the RELEASED level) for that package. Any plugins in the package not at the supported level or higher will not be automatically added. Clicking the checked checkbox will remove all plugins from the tool that belong to that package.
Clicking on the Configure link will bring up a dialog for adding individual plugins.
The Ghidra Project Window's Configure display shows its own list of eligible front-end plugins, as only certain plugins may be added to the Project Window.
Saving
Save changes to your tool by clicking on the
icon in the dialog's toolbar; save your tool to a different name by clicking on the
icon.
Configuring All Plugins
To Configure all plugins regardless of package, select the
icon in the dialog's toolbar and the Configure Plugins dialog will appear with all plugins in its plugin table.
Configure Plugins Dialog
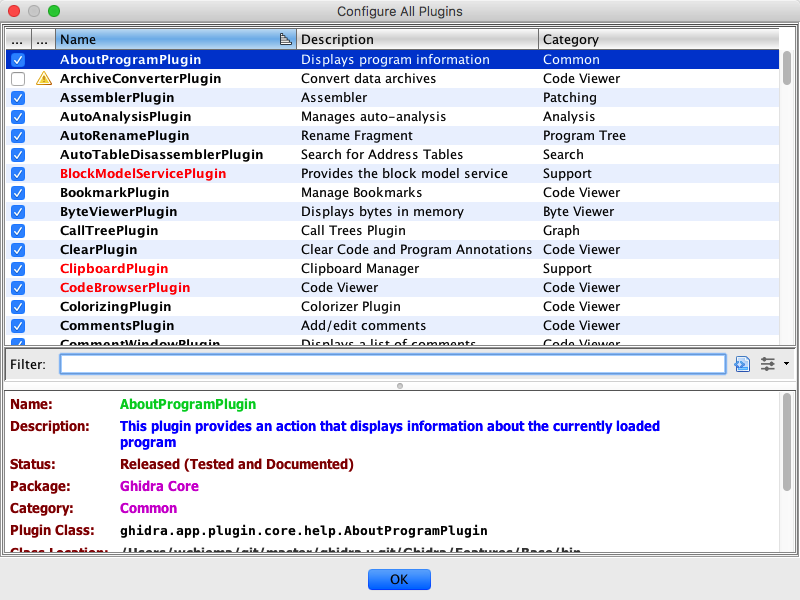
Selecting the Configure link for a package will bring up the the Configure Plugins Dialog.
The dialog has two parts: A table at the top of the dialog that shows of all the plugins in the package and an information window at the bottom that shows details about an individual plugin.
Plugin Table
The plugin table shows the following information for each plugin:
- Checkbox to indicate whether the plugin is in the tool;
- A status icon:
- Plugin name: the name is displayed in red when some other plugin depends on this plugin;
- Short description of the plugin;
- Category for where the plugin belongs functionally, e.g., it works in the context of a Code Browser or Byte Viewer, etc.
The Search Filter allows you to narrow the list of plugins displayed in the table. Only those plugins whose name or description contains the string that you enter as the filter will be displayed. As you type, the table is updated to reflect the filter.
Information Window
When you select a row in the table, the scrolled window below the table shows more information about the plugin and any contact information that the author supplied, e.g., author's name, organization, etc. The Dependencies section lists the class names of the plugins that depend on the selected plugin due to some service that it provides. The Class Location indicates from where the java classes are being loaded.
 -
the plugin is useable, but has not been fully tested and/or not
documented.
-
the plugin is useable, but has not been fully tested and/or not
documented.