A Ghidra Tool is a collection of building blocks, called Plugins. You can create tools by combining different Plugins that cooperate with one another to achieve certain functionality. You can add tools to the Tool Chest or configure them to share data and resources with other tools. Ghidra provides a set of Plugins, but you may create your own Plugins to add more functionality to your tools.
Ghidra provides a default tool, the Code Browser that is in your Tool Chest. It
has all of the Core plugins
already loaded. This tool may be re-imported into your tool
chest at any time. If the tools exist in your tool chest, then a one-up number is assigned to
the name to make them unique. (You will see the name in the tool tip, and in the Tools![]() Run menu.)
Any tool that you create and add to your Tool Chest is always available to your active
Project. However, you should save the tool if you plan to use it for other Ghidra
projects.
Run menu.)
Any tool that you create and add to your Tool Chest is always available to your active
Project. However, you should save the tool if you plan to use it for other Ghidra
projects.
The following sections describe tool management:
Create Tool
Create Tool creates an empty tool (no Plugins). What Plugins you should add is dictated by what you want the tool to do. The following steps can help you create a useful tool:
- Define your requirements for a tool.
- Determine whether the existing Plugins meet your requirements. If the Plugins do not provide the functionality, you may need to write your own Plugin that does meet your requirements.
- Add these Plugins to an existing tool or to a new tool.
To create a New Tool,
Save Tool to Tool Chest
When you save a tool to your Tool Chest, you are saving the tool's configuration such that it is available to your active project. (When you open any project, icons for all tools from your Tool Chest will appear in the Tool Chest panel in the Ghidra Project Window). An icon for a new tool shows up on the Tool Chest panel of the Ghidra Project Window.
 |
To save a tool,
- From the tool, select File
Save Tool
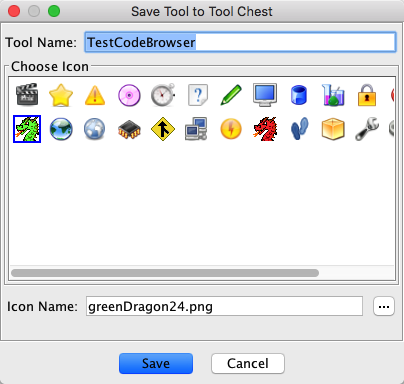
To save a tool to a different name, or to change the icon,
- From the tool, select File
- Enter a new tool name (the current tool name is shown in the Tool Name field by default).
- Choose an icon from the list of icons ... OR
- Click on the file chooser button (...) to choose a filename from the file system.
- Click on the Save button; if this is a new tool that you are adding to your tool chest, the Tool Chest panel will show the icon for the tool; icon and name changes (tool tip) and are reflected in the Tool Chest panel as well.
Export Tool
You can export your tool to an XML file in order to share your tool with other users. You may have configured your tool for a particular area of research or practice; others who are working on a similar problem may find your tool useful.
- To export a tool from the menu:
- Select File
- Select a folder and name for the exported file.
- Click on the Export button.
- To export a tool from the icon:
- In the "Tool Chest", right mouse click on the icon for the tool
- Select the Export... option.
The Status area on the Ghidra Project Window indicates whether the export was successful.
If the tool contains Plugins that are not part of Ghidra (i.e., you wrote new Plugins), you will have to distribute a jar file containing the class files for the Plugins along with the XML file. The recipient can then just place the jar file in one of the locations where Ghidra will search for available Plugins.
Export Default Tool
Exports the chosen tool without including user configuration information. This allows the user to export a tool without including personal settings. This may be helpful if the user is going to share the exported tool with others.
This action is only available from within a running tool via File
Import Tool
Import Tool to Tool Chest
Use the Import Tool option to import an exported tool into Ghidra. The imported tool will appear in your Tool Chest with the other tools. If the name of the imported tool already exists, a one-up number is assigned to the newly imported tool to make the name unique.
To import a tool,
- From the Ghidra Project Window, select Tools
- Select a file with a ".tool" or ".obj" extension.
- Click on the Import button.
If the import was successful, an icon for the tool is added to the Tool Chest panel. Any errors during the import are reported in the Status area on the Ghidra Project Window.
Import Default Tools to Tool Chest
The default tool for the Code Browser is part of the Ghidra installation, and can be added to your Tool Chest at any time. So if you delete the default tool from your Tool Chest, you can always recover them by using the Import Default Tools to Tool Chest option.
To import default tools,
- From the Ghidra Project Window, select Tools
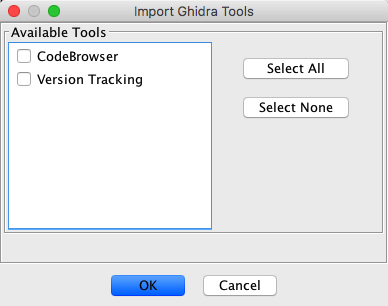
- A dialog is displayed that allows you to selectively import default tools. Select the tools you want to import and then select OK.
- The default tools are added to your Tool Chest; if the default tools already exist, then a one-up number is assigned to them to make the names unique, e.g., CodeBrowser_1.
Run Tool
To launch a tool from the Tool Chest,
- Click on the icon for that tool in the Tool Chest panel on the Ghidra Project Window, OR
- From the Ghidra Project Window, select Tools
To launch a tool with a specific Program,
- Drag a Program file from the data tree in the Ghidra Project Window, and drop it onto a tool icon in the Tool Chest panel. The tool is launched and has the Program opened.
Rename Tool
To rename a tool from the Tool Chest,
- Right-click on the icon for the tool in the Tool Chest panel in the Ghidra Project Window and select Rename from the popup menu.
- Enter the new tool name in the dialog that appears and press the <OK> button.
Set Tool Associations
For each type of file in the Front End you can set the tool that Ghidra uses to open that file, the associated tool. As an example, programs in Ghidra are, by default, associated with the Code Browser tool. The associated tool is the tool that will be chosen by Ghidra to open any file that is double-clicked. Regardless of the current associated tool, you may, at any time, drag a file in the Front End onto any tool in the Tool Chest in order to open the file in that tool.
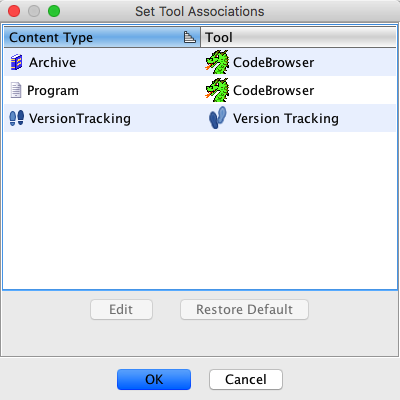
To change the associated tool for any file type, select Tools
This dialog shows a list of known content types and the tool that is currently used to open that type when double-clicked in the Front End. If the name and icon of the tool is grayed-out, that means the associated tool is not in your tool chest.
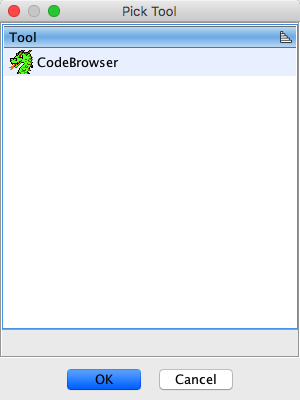
To change a tool association, select the desired Content Type in the list and then click the Edit button. This button will trigger the Pick Tool dialog.
This dialog shows a list of all tools that can open the given content type. If you choose a tool from the list that is not in your tool chest, then that tool will be added for you when you close the dialogs.
The Restore Default button allows you to restore the tool association to the default setting.
Close Tool
To close a tool (not the Ghidra Project Window),
- Select the File
- Right mouse click on the icon for the running tool and choose the Close option.
Program Changes
If you made changes to the Program and not saved them before you closed the tool, then a dialog is displayed to ask whether you want to save your changes.
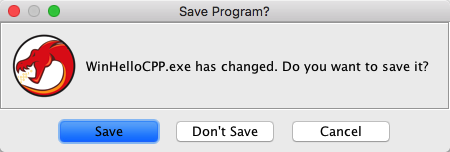 |
- Choose the Save button to save the Program.
- Choose the Don't Save button to close the tool but do not save the changes.
- Choose the Cancel button if you do not want to close the tool.
Tool Configuration Changes
Changes to tools are automatically saved by default. If you open multiple instances of the same tool and make changes to that tool, then Ghidra cannot automatically save the tool for you. In this case, Ghidra will ask you to make a decision regarding saving the changes.
You may configure Ghidra to not automatically save the tool via the Front End options (Edit->Options->Tool->Automatically Save Tools).
Delete Tool
To delete a tool from your Tool Chest,
- From the Ghidra Project Window, Select the Tools
- Right mouse click on the icon in the Tool Chest and select the Delete... option.
A dialog to confirm your delete request is displayed; choose the Delete button to remove the tool from your Tool Chest.
You can always get your default tools back into your Tool Chest by selecting the Import Default Tools to Tool Chestoption. However, deleting your own custom tool from your Tool Chest is a permanent operation.
Tool Status Components
The tool has a status area to display messages and an area to show progress for a running task, e.g., disassembly. On the right side of the lower portion of the tool, a "write" icon indicates that the program is being modified. The progress bar shows the progress of the running task. The spinning globe indicates that something is happening in the tool. The cancel button allows you to cancel the currently running task. You can still interact with the program while the task is running.
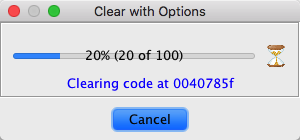
There may be times when a task is "modal" such that no user interaction with the program is allowed until either the task completes or you cancel it. A dialog is displayed to indicate what task is running and to allow you to cancel it. Depending on the task, the dialog may or may not show a progress bar.