The Tool Options dialog has a filter text field that can be used to quickly find options relating to a keyword. Any options names or descriptions that contain the keyword text will be displayed.
Each tool has an Options dialog that shows options in a tree format. When you click
on the node, the associated options appear in a panel to the right of the tree. At a minimum,
the tree has a node for key bindings and tool options . Select the node to show the
corresponding options that you can change. Plugins may provide their own options, in which case
new nodes in the tree or new options for the tool may show up. Options provide a flexible way
for changing plugin behavior or functionality.
To display the Options dialog, select Edit![]() Tool Options from the tool menu.
Tool Options from the tool menu.
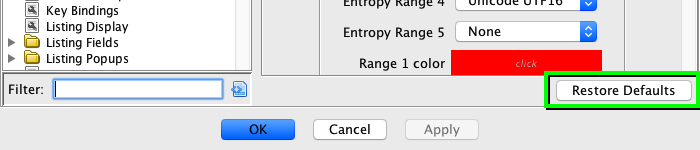
You can restore any currently selected options panel to its default settings by pressing the Restore Defaults button at the bottom of the options panel. Use caution when executing this action, as it cannot be undone.
You can create a new key binding (accelerator key) for an action or modify the default key binding. The key binding that you add can be used to execute the action using the keyboard. Below we describe the Key Bindings options editor.
Not all key bindings are changeable via the tool options. For example, the following keys cannot be changed:
- System Action Keybindings - System action default key bindings can be changed, with added restrictions: 1) The binding for a System action cannot be used by any other action, 2) A key stroke bound to a System action cannot be used by another action until that key stroke is cleared from the System action. The UI will show a message when these restrictions are triggered.
- Menu Navigation Actions: 1-9, Page Up/Down, End, Home (these key bindings are usable with a menu or popup menu open and are otherwise available for assignment to key bindings).
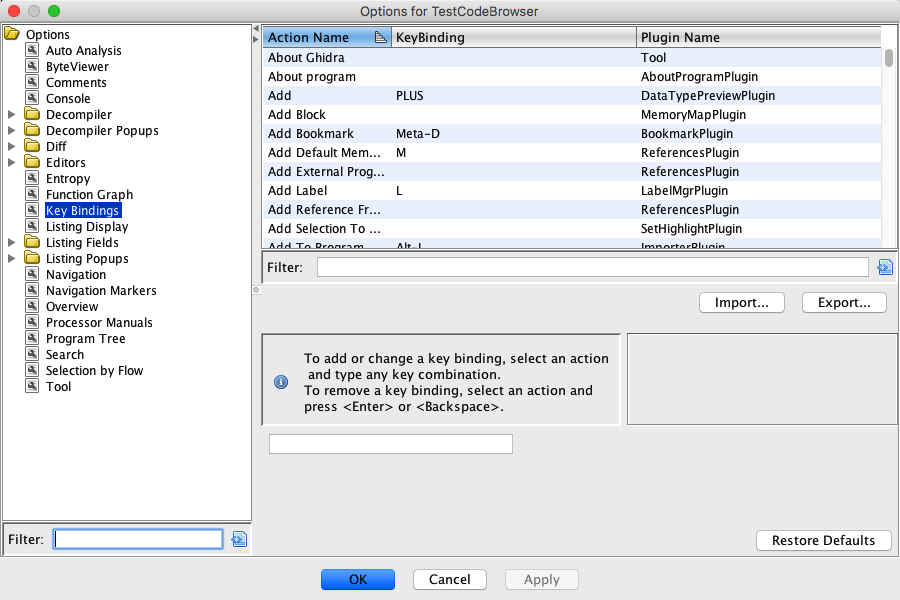
The Key Bindings option editor has a table with the following sortable columns: Action Name, Key Binding, and Plugin Name. To change a value in the table, select the row and then edit the text field below the table.
- The text field below the table captures keystroke combinations entered.
- If an action has a description to explain what it does, it will be displayed below the text field.
The display below shows the key bindings panel for the Project Window. Using the Key Bindings Options panel works the same as for a regular Ghidra Tool.
Change a Key Binding
To change the Key Binding,
- Select Edit
Tool Options from the main menu.
- Select the Key Bindings node in the options tree.
- Select an action name to either set a key binding or change the existing key binding.
- Click in the text field and type the key or keystroke combination (e.g., Ctrl x).
- When a key is mapped to multiple actions, the action name is listed below the text field.
- Click on the OK or Apply button.
When a key is mapped to multiple actions, and more than one of these actions is valid in the current context (i.e., the action is enabled), then a dialog is displayed for you to choose what action you want to perform.
To avoid the extra step of choosing the action from the dialog, do not map the same key to actions that are applicable in the same context.
Remove a Key Binding
To remove a Key Binding,
- Select Edit
- Select the Key Bindings node in the options tree.
- Select an action name for the key binding that you want to remove.
- Click in the text field for the key binding.
- Press the <Enter> or <Backspace> to clear it.
- Click on the OK or Apply button.
Import Key Bindings
To import a Key Binding,
- Select Edit
- Select the Key Bindings node in the options tree.
- Press the Import... button.
- On the warning dialog, press the Yes button to import key bindings or the No button to cancel the process.
- On the file chooser dialog, choose a previously exported file from which to import key bindings.
- Press OK to import the key bindings.
Importing key bindings will override your current key bindings settings. It is suggested that you export your key bindings before you import so that you may revert to your previous settings if necessary.
Key Binding Short-Cut
A key binding can be applied to any menu item or toolbar icon. For example:
File
Data
Apply key bindings to menu items or icons that are frequently accessed. To do this:
- Display a menu item.
- Place the cursor on the menu item or let the mouse hover over an icon on the toolbar.
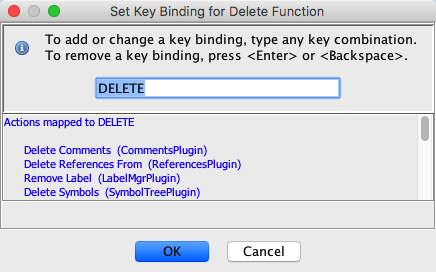
- Press the <F4> key to display Set Key Binding dialog:
- Enter a key combination in the Set Key Binding dialog, The panel below the text field that accepts the key input shows the other actions that are mapped to the key. These are potential collisions if these actions are enabled at the same time. Press OK to change the key binding.
- The key combination that is entered in this dialog will be the key binding for the menu item.
Export Key Bindings
To export a Key Binding,
- Select Edit
- Select the Key Bindings node in the options tree.
- Press the Export... button.
- If you have made changes, then you will be prompted to apply those changes before continuing.
- On the file chooser dialog, choose a file to which to export key bindings.
- Press OK to export the key bindings.
Tool is a default node in the options tree that shows up in each tool's options window. The Tool panel defines the options for the Tool. The table below lists the basic options. Plugins may add their own options to the Tool options. If a tool does not have a plugin that uses an option, the option will not show up on the Tool panel. For example, the Ghidra Project Window does not have plugins that use the Max Go to Entries or Subroutine Model, so these options will not appear on the Tool panel. If an option has a description, it will show up in the description panel below the tree when you pass the mouse pointer over the component in the options panel.
Option Description Copy Strings Without Quotes If selected, copying strings to the clipboard from the listing, decompiler, or bytes viewer will remove outer quotes. Docking Windows On Top Selected means to show each undocked window on top of its parent tool window; the undocked window will not get "lost" behind its parent window. Unselected means that the undocked window may go behind other windows once it loses focus. Use the Windows menu to make the undocked window visible. Goto Dialog Memory Selected means that the last goto query will remain in the dialog the next time the dialog is invoked. Max Goto Entries Number of past entries to keep in the Go to Address or Label dialog Max Navigation History Size Max number of items to retain in the navigation history. dialog Show Program Tabs Always If selected, a program tab will be displayed even there is only one program open. Subroutine Model Sets the default subroutine model. This setting is mainly used when creating call graphs. See Block Models for a description of the valid Models. Use C-like Numeric Formatting for Addresses Selected means to attempt to interpret the value entered in the Go To dialog as a number as follows:
- interpret the value as a hex number if it starts with "0x"
- interpret the value as an octal number if it starts with "0"
- interpret the value as a binary number if it ends with a "b"
To change Tool Options,
- From the tool, select Edit
- Select the Tool node in the options tree.
- Change the value for the option.
- Click on the OK or Apply button.
Some Tool options can only be set from the Front End. Some of those are described below.
Option Description Automatically Save Tools This controls whether Ghidra will save tool state when the tool is closed. Default Tool Launch Mode This controls if a new or already running tool should be used during default launch. Tool "reuse" mode will open selected file within a suitable running tool if one can be identified, otherwise a new tool will be launched. Docking Windows On Top Selected means to show each undocked window on top of its parent tool window; the undocked window will not get "lost" behind its parent window. Unselected means that the undocked window may go behind other windows once it loses focus. Use the Windows menu to make the undocked window visible. Restore Previous Project This controls whether or not Ghidra automatically opens the previously loaded project on startup. Show Tooltips This controls whether or not Ghidra will show tooltips. Use DataBuffer Output Compression This controls whether or not Ghidra will compress data being sent to the server. Use Notification Animation This controls whether or not Ghidra will use automations to provide visual feedback that something is happening, such as launching a tool.
Some features of Ghidra require opening programs briefly. Often the same set of programs may need to be opened repeatedly. Ghidra provides a caching service to make these uses more efficient. The following two options are available:
Option Description Program Cache Size This options specifies the maximum number of programs to keep open in the cache. Program Cache Duration This option specifies how long (in minutes) to keep an otherwise unused cached program open. If the program is in use by some feature, it won't be closed when the time expires, and it will stay in the cache for the full cache time.