For projects that are not shared, all files and versions are managed locally in your project
directory. For the shared project repository, files are maintained on the Ghidra Server. When
you check out a file, a file is created locally in your project directory. When you check in a
file, it is merged (if necessary)
with the latest version to create a new version. Merging is necessary only for shared project
repositories, as with a non-shared project, the version you checked out is always the latest
version.
When you open a shared project, Ghidra attempts to connect to the server that is
associated with the shared project. Depending on what user authentication mode the server is
using, you may have to enter a password. If the server is not running, you are still able to
work with your checked out files while you are offline. Other versioned files not checked out
are not accessible. When the server comes up, Ghidra will reconnect as necessary. You can
also attempt to connect "manually" by selecting the connection status button  on the Ghidra Project Window or on the Project Info dialog. When the
connection is successful, the connection status button changes to
on the Ghidra Project Window or on the Project Info dialog. When the
connection is successful, the connection status button changes to  .
.
If you lose the connection to the server after having started Ghidra, shared files not
checked out "disappear" from the Ghidra Project Window, as they are unavailable. Private
files remain intact and are not affected by the server connection.
 You are authenticated only once per
Ghidra session; so if you open other project repositories managed by the same Ghidra Server,
you will be prompted only once for a password, as required.
You are authenticated only once per
Ghidra session; so if you open other project repositories managed by the same Ghidra Server,
you will be prompted only once for a password, as required.
Troubleshooting a Failed Connection
If you fail to connect to the Ghidra Server, check the following:
- Verify that the client machine can "ping" the server machine.
- Verify that you are attempting to login using the correct authentication mode.
- Verify that the Ghidra Server administrator has added you as a user on the
server.
- If the server is using Ghidra Password authentication, you may need to have your
password reset to "changeme" by the Ghidra Server
administrator.
- Verify the host name and port of the Ghidra Server.
- Verify that the Ghidra Server is running: from a command window,
type
telnet [host] [port]
If the server is not listening on that port, you will get a failed connection message
from telnet.
Except for merging, accessing
version control features is the same regardless of whether your project repository is
shared.
Add to Version Control 
Add a file (or multiple files at once) to version control by selecting the file in the
Ghidra Project Window. You can either click on the tool bar icon, , or right mouse click and choose the Add to Version
Control... option. A dialog is displayed so that you can add comments about the
file.

Leave the checkbox selected for Keep File Checked Out so that you do not have
check out the file after you have added it to version control. This checkbox will be
selected and disabled automatically if you have the file open. The Apply to All
button allows you to associate the same comment for multiple files that you are adding to
version control. After you add the file, the Ghidra Project Window indicates the file's
check out state and version.

This image shows that the file
"Program_A" is associated with a shared project (note the blue border on the file icon), and you
are now working with version 1 of 1. The file "Program_B"
has not been added to version control (note the plain icon and no version information). It
is considered to be a "private" file. Private files are never visible to other users.
 A normal checkout is indicated by a
checkmark with a green background
A normal checkout is indicated by a
checkmark with a green background , while an
exclusive checkout is is indicated by checkmark with a blue background
, while an
exclusive checkout is is indicated by checkmark with a blue background . A checkmark with a red background
 indicates that a newer version has been checked-in
by another user.
indicates that a newer version has been checked-in
by another user.
A tool tip on the file (let the mouse pointer hover over it) shows the date
the file was checked out, and the date that is was last modified. An asterisk will appear
on the file icon to indicate that changes have been made but not checked in.
Check Out 
To check out a file, select the file in the Ghidra Project Window. You can either either
click on the check out icon on the tool
bar, or right mouse click on the file and choose the Check Out...
option.
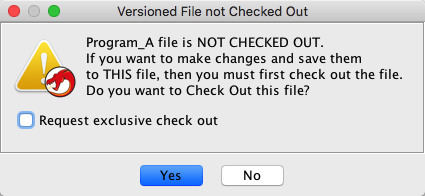
If your project repository is shared, a dialog is displayed to allow you to request an
exclusive lock on the file. An exclusive
lock is necessary if you plan to manipulate the memory map in any way,
e.g., move or delete memory blocks, change the program's
language, etc. An exclusive lock can be granted if no other user has the file checked
out. While the exclusive lock exists, no other user can check out the file.
The exclusive lock is implied for a
non-shared project repository.
Check In 
After you have made your changes and saved them, you are ready to check in your file.
(You cannot check in a file that was not changed.) The check in creates a new version for
this file. To check in the file, select the file in the Ghidra Project Window. You can
either click on the check in icon on the
tool bar, or right mouse click and select the Check In... option.
The icon is also available from the tool where you have the
file opened.
A dialog is displayed so that you can enter comments that describe your changes.
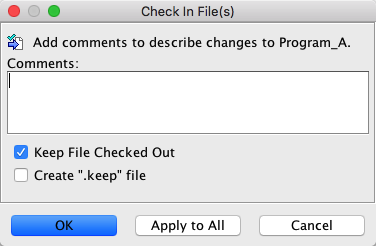
The checkbox for Keep File Checked Out is selected and disabled automatically if
you still have the file open. If the file is closed and you plan to create more versions,
leave the checkbox selected for Keep File Checked Out. The checkbox for Create
".keep" file is selected by default; this option causes a copy of the file that you are
checking in to be created on your local file system.
In a shared project repository, when you check in your file, the changes in your file
may have to be merged into the
latest version on the server. This will be the case if another user checks in a file
since you did a checkout on the file. Under most conditions, the merge will be automatic
without any intervention required on your part. However, if you made changes such that a
conflict arises, you will have to resolve the conflict
at the time of check in. When another user checks in his file, you will see navigation markers
for changes made since you checked out your file. Potential conflicts are indicated
in red. Refer to the Merge
page for more information about merging.
Undo Checkout 
You may want to undo your checkout such that you lose all your changes, and your file
reverts to the latest version on the server.
To undo a checkout:
- Close the checked out file.
- Select the checked out file in the Ghidra Project Window.
- You can either click on the undo checkout icon in the tool bar, or right mouse click on the
selected file and choose the Undo Checkout option. If you had made changes to the
file, a dialog is displayed confirm the undo check out.
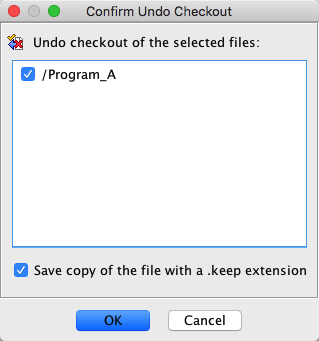
If the checkbox on the dialog is selected, then a private file is created
with a ".keep" extension on the filename. The checkbox is selected by default.
If you have the file
open in the Code Browser when you attempt to undo the check out, you will get an error
dialog indicating that the file is in use. You must close the file first, then undo check
out.
Update 
While you are working on a program in a shared project repository, you may want to
periodically update your program to receive any changes made by others who are working in
the same shared project repository. Use the Update... option to bring your
copy into sync with the latest version of the program in the repository. If your
changes conflict with those made in the latest version, you will be prompted to merge changes from the latest version
into your program.
Consider this scenario: Suppose you are working on version 4 of 5 of a
program. The "5" indicates that there are 5 versions of the program in the
repository. The "4" indicates that your working copy of the program is based on the
version "4" version that you checked out from the repository. (To see the version
numbers for your programs, check the file's status in the
Ghidra Project Window data tree). When
you update, you will update to the latest version in the repository (5). After the
update is complete, your file status will show "Version 5 of 5" just as though you had
checked out version 5. The Update... option allows you to have the latest
changes applied to your program without your having to check in your file.
To update your current program either select the program in the Ghidra Project Window
and click on the update icon in the tool
bar, or right mouse click and choose the Update... option. The Update
option is only enabled when the latest version number on the server is greater than
the version that you checked out.
The icon is also available from the tool where you have the
file opened.
The update action is not applicable
in a non-shared project repository.
Undo Hijack 
A file becomes "hijacked" when it exists locally as a private file in your project
and a file of the same name exists in the repository. This will happen when
user another adds a file to version control while you have a private file of the same name
in your shared project. It can also happen if your checkout of the file is terminated. The file icon in the Ghidra
Project Window changes to indicate that it is hijacked. To undo the hijack:
- Close the file if you have it open.
- Right mouse click on the hijacked file(s) in the Ghidra Project Window .
- Select Undo Hijack.... The following dialog is displayed to confirm the undo
hijack.
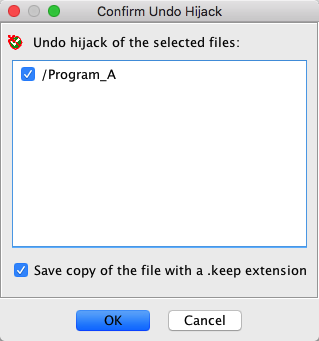
Deselect the checkbox next to the name if you do not want to undo the
hijack for that file. The checkbox, Save copy of the file with a .keep extension, is
selected by default; if the checkbox is selected, a .keep file will be created. In this
example, you would see SharedProgram.exe.keep in your project data tree after you
select the OK button. The checkbox selection applies to all the files that you
have selected for the undo hijack.
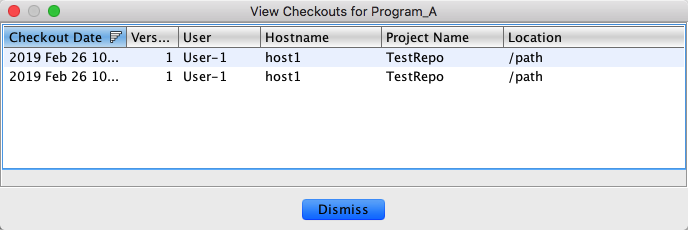
To view a list of all the files that you have checked out in a folder and all of its
subfolders, select a folder, right mouse click and choose Find Checkouts.... In the
sample image below, all checkouts from the root project directory (pathname of "/") are
displayed; one file from the "TestFiles" folder is checked out.
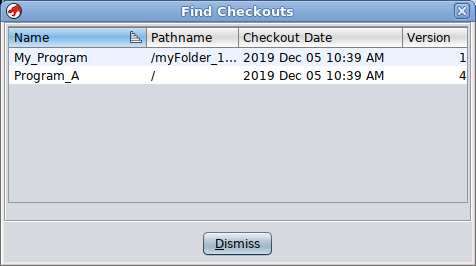
Name is the name of the file;. Pathname is the complete path to
the file. Checkout Date is when you checked out the file. Version is the
version number of the file that you have checked out.
From this dialog, you can
check in your files or undo your
checkout. Make a selection in the table, right mouse click and choose Check In...
or Undo Checkout. You can also click on the toolbar icon to check in, or click on the icon to undo the check out.